There are several elements that contribute to creating what would be considered a successful property CGI (interior visualisation or exterior visualisation)
There are, the 5 main points we like to stick to at North Made Studio. These are tried and tested and result in great property CGI images that achieve great ROI:
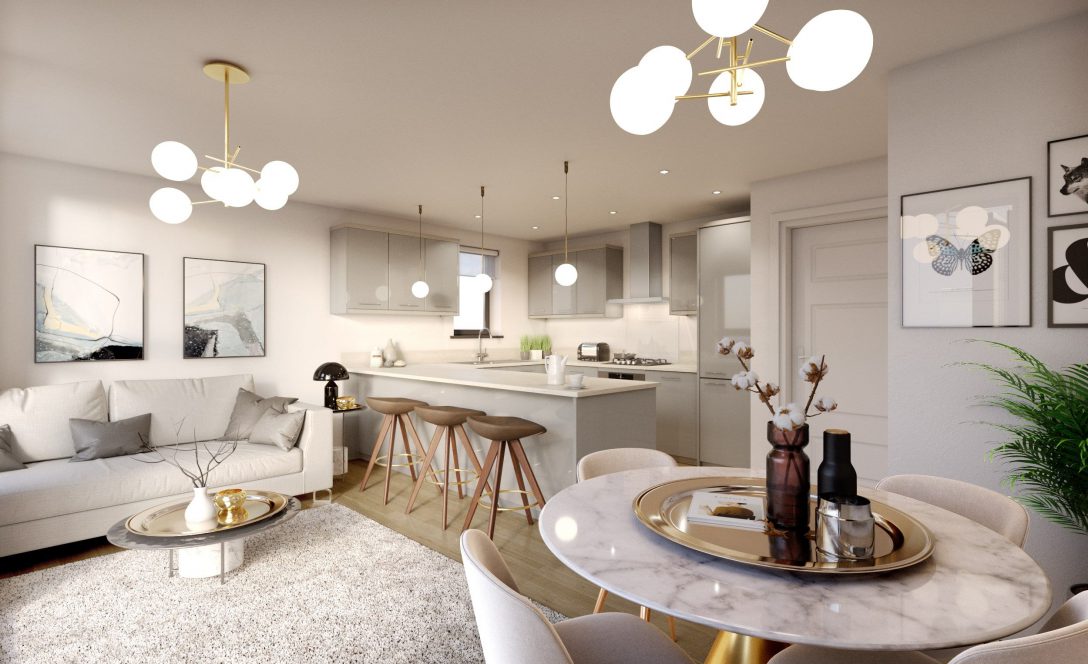
Well designed and composed geometry.
The building/room geometry acts as the ‘skeleton’ to the image, without this you won’t have a scene! That’s why it is vital to spend time ensuring the geometry is correct, physically accurate and within proportion. Failure to do this can result in odd looking scenes that not only look strange but are also not a correct representation of the completed property development. So you end up with images that do not actually show clients what they will be buying.
Expertly sourced professional textures, shaders, materials and maps.
You cannot create a high end visual without high quality textures/shaders. Textures are used to ‘dress’ your geometry. The difference between an average CGI and a high quality CGI is usually down to the textures used. It is vital the textures are seamless (so they can be tiled to create smooth endless surfaces) and are of high resolution (4K is now becoming the standard in our industry). Once textures are sourced it’s important to ensure they react to the surroundings accurately, so they may require research, material analysis and a strong understanding of materials and their properties. By reactions we mean things like reflections. Obviously a wooden panel will reflect differently to a piece of granite, it takes research and experience to work out the best way to show this in a photo-realistic way that will not spoiler the illusion of a photo realistic CGI image.
Professional light source set up
Lighting is another key ingredient. Make sure a HDRI is used to light a scene. An HDRI uses physically correct data to light up a scene so this is a starting point. The scene can then be lit up using additional light sources such as suns, street lights, interior lights etc. Again its important to ensure the colour/temp is correct. Interior light temp is usually 3800/4000 and exterior sun light is usually around 6500/7000.
Failure to follow these steps in the light set up process can result in a scene that looks overly artificial and will not engage the viewer correctly.
Rendering your image correctly.
A stage that is usually overlooked. You cannot just simply click render and hope for the best. It is important the render settings are adjusted to meet the scenes requirements. Ensure render elements are also set up as they’re used during the post production stage.
Another tweak that helps a 3D CGI image look photo-realistic is ensuring the ‘noise’ in an image is low as possible, aim is to get this to below 2% and using the denoiser feature (available in leading rendering softwares such as v-ray and corona) can help to remove excess noise. But remember, over-relying in these can cause issues and textures can lose some of their detail. It is a fine balance that is learnt and perfected through trial and error and experience gained over time.
The final step – Excellent post production
This is where the whole image comes to life. Whether its an interior, exterior or product, this is where the image is composed, edited, brightened and finished with filters. The settings these will allow you to add another dimension to your image with minimal effort. But beware, over doing it this stage can distort your image, taking it away from the photo realistic CGI you are aiming to achieve. A good experienced 3D artist will know when to stop and only add just enough detail/enhancement to an image to perfect it.